


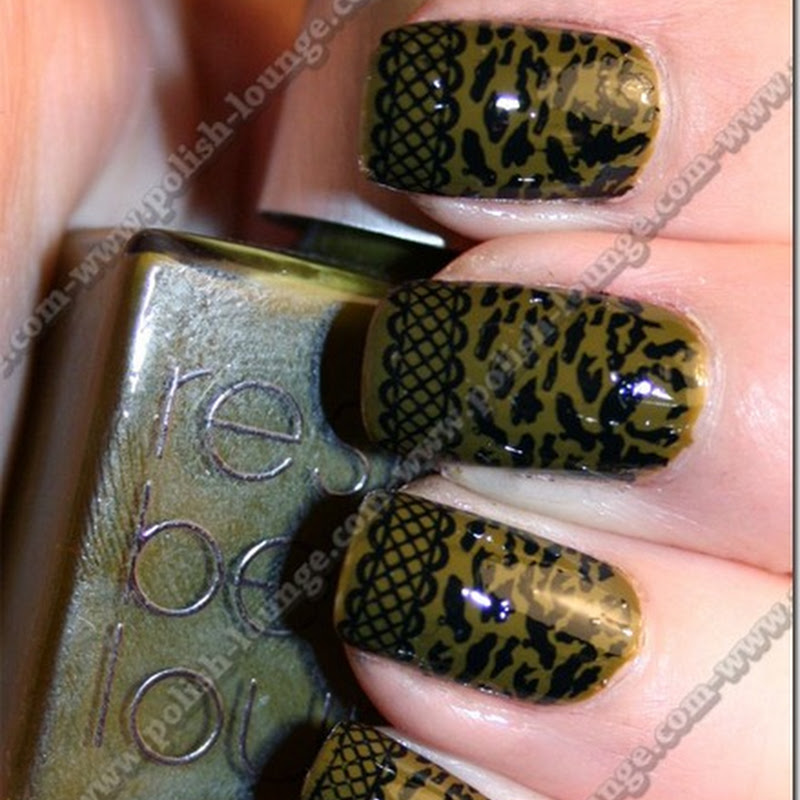
Hello everyone =) Today I'm going to talk about ways to avoid smudging while applying a regular topcoat. As most of you know, Konad special polishes are somewhat different than regular polishes, they won't dry quickly & tend to smudge if it's not konad topcoat. In the beginning I struggled for a long time with special polishes, but slowly I got the hang of it.
Here are some tips I think you might find useful:
- Always have a seperate, runny topcoat only for konading. The gloopier it gets, the harder it becomes to avoid smudging.
- Use a topcoat with a natural hair brush. Synthetic brushes will 90% smudge your design. If your favorite topcoat comes with a synthetic brush, extract a better, natural hair brush from an old bottle & use that.
- Only stamp after your base polish is completely dry. Take your time.
- After stamping, run your hands under cold water. This helps drying konad special polishes.
- Wait for about 15 minutes before proceeding with topcoat. Again, do not hurry. You will see what kind of a difference it makes once you try.
- Applying topcoat should go like this: Get a moderate amount of topcoat on the brush, not too much, but never too few. To much could make your design "bleed" as it wouldn't dry quick enough, and too few will make the brush touch the surface and it will streak and smudge. The amount should be enough to cover the nail without touching the brush to the surface. You can dip into your bottle between strokes, but within one stroke the brush may not meet the surface.
- Apply topcoat in 3 very quick steps like shown below:
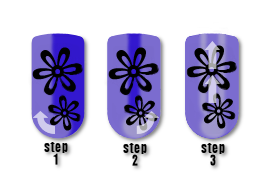
Complete coverage is not important. Go over the main part of the design first. Most of the smudging happens there. While using a full nail design, start from the sides and do the upper middle part last.
- Don't start at the bottom for a third time. (Step 3 above.) Start from the middle and go up. The topcoat will even out itself.
- Remember, only the first coat of topcoat is important. Don't try to get a perfect coverage, as this will probably ruin your design. You can always do a safe second coat afterwards.
- Any topcoat works with konad. The only things that could ruin the design are the brushes and brushstrokes.
Merhaba =) Bugün konad üzerine cila sürerken göz önünde bulundurulması gereken bazı detaylardan bahsedeceğim. Biliyor musunuz bilmiyorum ama, konad'ın kendi ojelerinin yapısı normal ojelerden daha farklı. Oldukça yoğun ve opak olan bu ojeler kendi başına kurumuyor, ve konad hariç bir cila sürüldüğü zaman sürüklenebiliyor. Bu da tüm deseni mahvediyor. Başlarda cila sürerken oldukça zorlanıyordum, ama zamanla (ve azimle) becerebilmeye başladım. İşte işinize yarayabilecek bazı bilgiler:
- Konad için her zaman normal cilanızdan ayrı, yapısı bozulmaya başlamamış bir cila kullanın. Cila katılaştıkça deseninizi mahvetmeye müsait hale gelir.
- Cilanızın fırçası bildiğimiz siyah fırça olsun. Sentetik beyaz fırçalar yüksek ihtimalle deseninizi bozacaktır. Eğer cilanızın fırçası sentetikse, başka bir oje fırçası kullanın.
- Tabana sürdüğünüz oje tam kurumadan damga yapmayın. Burada kaybedeceğiniz süre, silip tekrar yaparken kaybedeceğiniz sürenin yanında hiç kalır ;)
- Damga yaptıktan sonra ellerinizi soğuk suya tutun. Bu konad ojesinin kurumasına yardımcı olur.
- Koruyucu cila sürmeden önce 15 dk. kadar bekleyin. Acele etmediğiniz zaman daha iyi sonuç aldığınızı göreceksiniz.
- Cilayı şu şekilde sürün: Fırçanın üzerinde bol miktarda cila olsun, ama her tarafa akacak kadar değil. Miktar bir seferde fırçayı tırnağa değdirmeden dipten uca sürebilecek kadar olmalı. Tırnağın her yerine cilayı bir seferde sürmek zorunda değilsiniz, önemli olan bir sürüş içerisinde fırçanın tırnak yüzeyiyle temas etmemesi.
- Cilayı üç seferde, aşağıdaki gibi sürün:
Mükemmel sürmeniz çok önemli değil. Önce desenin yoğun olduğu yeri aradan çıkarın. Tam kaplayan bir desen üzerine sürerken ise önce yanlara, en son olarak da ortaya sürün.
- Üçüncü adımda, tırnağın dibinden değil, ortasından başlayın. Sadece boş kalan yere sürün cilayı, cila kendi kendine düzgünleşecektir.
- Unutmayın, cilanın ilk katının sadece deseni koruması önemli. Sonra ikinci, düzgün bir kat sürebilirsiniz. Cilayı bir katta mükemmel sürmeye çalışırken deseni bozmayın.
- Konad her cilayla uyumludur. Aksini söyleyene inanmayın. Tek dikkat etmeniz gereken fırça ve onu nasıl kullandığınız.
")
 Site URL
 E-Mail


.JPG)


.JPG)


wow, that picture is just gorgeous.
ReplyDeleteGreat tips!!! :D
thank you, brooke =)))
ReplyDeleteI actually have the konad topcoat but it smudges my designs more than regular polish :/. I've been konading for while so now i have my own tricks :). Thanks for the post! It's always useful to know how people does it.
ReplyDeletethanks for the post sweety!! this technique really prevents smudging on konad
ReplyDeleteThis was really helpful Trincess. I tried Poshe for the first time and it smeared really bad. Next time I'll let the design dry for awhile.
ReplyDeleteGetting the top coat over Konad has been a hit or miss deal with me. Thanks for the tips. I think it will make using topcoats much easier over the stamping. :)
ReplyDeleteThank you for posting that up - extremely helpful..
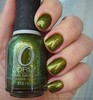
ReplyDeleteAND that yellow is making me want to flip a table because it is soooo gorgeous!!
Great tips! I feel that the Seche Vite topcoat doesn't smudge the designs at all no matter how soon after stamping it is applied. I have yet to be successful with regular topcoat thought. Maybe I can try again now with these tips.
ReplyDeleteThanks!
How do you know if your polish has a natural brush?
ReplyDeleteYukarıda dedikleri gibi Seche Vite ile smudge olmuyor, ama ben Pastel'in 1 liralık şeffaf ojesini topcoat yaptım kendime, çok başarılı :D
ReplyDeleteGreat tips, girl! :)
ReplyDeleteThanks for the great tips!
ReplyDeleteAwesome tips! :)
ReplyDeleteThank you so much for taking all this time to type your posts . They are very informative and clear as crystal water .
ReplyDeleteCaro xxx
Thank you guys! =D I'm happy if this was any use.
ReplyDeleteRebecca, regular black brushes are natural. By synthetic, I mean the transparent slick ones, which look like made of fiber.
Thanks for the tips, very useful xx
ReplyDeleteThanks for these tips! Everytime I think I've finally got the hang of it, I'll end up smudging something. Now I think I can narrow it down to my topcoat not being "runny" enough =)
ReplyDeleteWhat about putting your hands in water until the polish dries?
ReplyDeletethat would be OK, too =)
ReplyDeleteThanks for the marvelous posting! I genuinely enjoyed reading it, you are
ReplyDeletea great author.I will remember to bookmark your blog and definitely will come back someday.
I want to encourage you to definitely continue your great writing,
have a nice weekend!
Stop by my webpage ... Treatment Of Opiate Addiction