

Hey guys =) Finally, my first tutorial! First I want to tell you I'm incredibly camera shy. I can't narrate because I don't trust my pronunciation very much. =) And I'm really afraid of making mistakes, because especially with nails, it's so hard to correct & re-shoot everything!
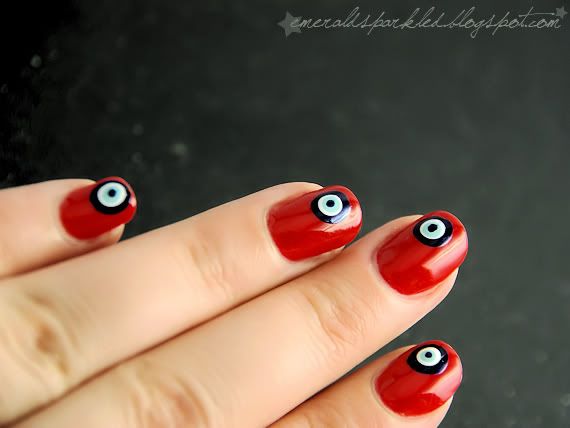
So I decided to make a very simple tutorial for the famous evil-eye design, and I hope you find it useful or enjoy it generally.
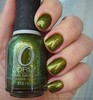
P.S: The manicure above is different from the one seen on the video. I was experimenting with different sizes & combinations =)
Merhaba arkadaşlar =) Sonunda, ilk videom! Öncelikle belirtmek isterim ki, kamera karşısında çok utangaçım. Videoda ses yok çünkü telaffuzuma pek güvenemiyorum =) Ayrıca tırnaklarımı kamera karşısında yaparken geriliyorum, çünkü hataları düzeltip yeniden çekmek çok vakit alıyor.
Bu yüzden nazar boncuğu deseninin yapılışını anlatan basit bir video çekmeye karar verdim, umarım yardımı olur ve hoşunuza gider.
Üst resimdeki manikür videodakinden farklı. Son günlerde bir sürü farklı farklı boylarda ve renklerde nazar boncuğu manikürü yaptım da =)
Bu yüzden nazar boncuğu deseninin yapılışını anlatan basit bir video çekmeye karar verdim, umarım yardımı olur ve hoşunuza gider.
Üst resimdeki manikür videodakinden farklı. Son günlerde bir sürü farklı farklı boylarda ve renklerde nazar boncuğu manikürü yaptım da =)
")
 Site URL
 E-Mail


.JPG)


.JPG)


Now the whole time I thought you were just really good at painting circles! ;) Good idea to use everyday objects as a dotting tool! P.S. I like that song! Great tutorial!
ReplyDelete=DDD Haha! Home made dotting tools rock! =)
ReplyDeleteThank you <3
Awesome tutorial, thank you so much :)
ReplyDeleteIn my country, Greece, the evil eye charms are very popular too so I am definitely gonna try this.
thank you, Cel =)
ReplyDeleteglad to meet a neighbor =)
Çok güzel olmuş, fikir şahane :) Çok yeteneklisin Deniz'cim, bayıldım :) Bu arada dotting tool olarak kurşun kalem kullanıyorum ben hehe :)
ReplyDeleteThis is a great tutorial!
ReplyDeletesagol marjo'cum =)))
ReplyDeletethank you, biba! =D
Oh, I love this! It looks really fantastic, I'm excited to give it a try. :)
ReplyDeleteHow innovative to think of using regular household items to make circles!
Really great tutorial, thank you!
You are really creative!!!
ReplyDeletethank you, guys =)
ReplyDeleteCok guzel olmus Deniz ellerine saglik yenisini bir heyecan bekliyorum =)
ReplyDeletetesekkur ederim zuzucum =) yenisi icin calismalar surmekte =)
ReplyDeleteso cool... love to try this out!!
ReplyDeletethanks, thriszha =)
ReplyDeleteHow long did you wait to put on the top coat?
ReplyDeleteby the time I was done with the last nail, I started putting on topcoat, but I suggest you to wait about a minute before proceeding with topcoat =)
ReplyDeleteAwesome art! I gotta try that.
ReplyDeleteI'm a big fan of Turkish culture and I always carry a Nazar Boncugu with me.
I love your blog. Whenever I need some new ideas, I check your posts.
Keep up the great work :)
Görüşürüz
@rafinhaf thank you so much, glad you liked it =))) görüşürüz! =D
ReplyDelete